Mark Reds

Preserving the past, building the future on markreds.it

Categoria: Retromania

Retrocomputing is the use of older computer hardware and software in modern times.

  • Installing a “Modern” System 7.5.5

    Installing a “Modern” System 7.5.5

    Enhance TCP/IP Connectivity and use every 68k Application!

    This is the original article written by Tyler Sable, spam at fenestrated separated by dot from net. You can find him on the 68kMLA forums as TylerEss. Since the original article is not more available on the web I post it here in my blog with the software installer packages. Enjoy!

    One of the biggest problems with using an older Macintosh with a 68k processor is interoperability with more modern computers, over the internet. Other shortcomings, such as a small amount of RAM or slow processor speed, can be compensated for at a minimal cost at these machines’ age. The world has moved beyond AppleTalk, however, and we will get along a lot better if we can use TCP/IP for file sharing and printing.

    System 7.5.5 does not come configured to use TCP/IP for either printing OR AppleShare. This article will show how to remedy this shortcoming without running into the crashing, failure to install, and general badness I had to wade through.

    The first time I tried to install a modern system 7.5.5 on my SE/30, I simply could not get it to work. It turns out that the problem was due to my failure to install the updates in the correct order. By installing the updates in the order I list below, you will arrive at a very functional and stable system.

    I recommend this configuration for any 68k Mac with at least a 68030 processor and 16MB of RAM. 16MB seems like a lot, but with our old RAM being so cheap on eBay, 16MB is easy to get and very important for a computer you intend to use on a daily or weekly basis.

    If you have a 68030 Mac with less than 16MB of RAM and no way to upgrade, there’s still hope. Following this procedure but leaving out QuickTime 4 and MRJ leaves a System that will boot in just about exactly 4MB. This would leave 4MB for applications on an 8MB PowerBook.

    CFM-68k Runtime Enabler Note:You will find that there is no need to install CFM-68k Runtime Enabler 4.0 (required by Navaigtor 4.0 and other software) if you follow the directions presented here. It is installed by LaserWriter 8.5.1.

    Install System 7.5.5

    The first step is to install System 7.5.3, which is downloadable from Apple here: 1, 2, 3, 4, 5, 6, 7, 8, 9, 10, 11, 12, 13, 14, 15, 16, 17, 18. Download all parts into one folder. After it is installed, install the System 7.5.5 Update, which is available from Apple here: 1, 2, 3, 4, 5. Now you’ll be running stock System 7.5.5. Restart.

    Install OpenTransport

    To form a base to add network software onto, install OpenTransport 1.1.2 (there’s no need to install 1.1.1 first). Download it here. Restart.

    Install TCP/IP Networking Tools

    Now you’ll install the updates that allow access to AppleShare and printing via TCP/IP. Make sure you run the Network Software Selector utility first to ensure you’re using OpenTransport. Restart if necessary.

    First, install the AppleShare Client 3.7.4. Download it here.

    Second, install the LaserWriter 8.5.1 updater. Download six images: 1, 2, 3, 4, 5, 6.

    Restart.

    Install TidBits

    Install QuickTime 4.0.3. I can’t think of any particular reason to install this last 68k version instead of an older, possibly smaller version, but it has been working very well for me. Actually, I think this version supports Shockwave Flash movies, but don’t quote me on that. Download the QuickTime 4.0.3 installer here. If that link doesn’t happen to work, or you need a version localized for a different language, the page with download links is here.

    Install Appearance Manager 1.0.3. The only way this software is available from Apple is as part of the entire SDK, which is about 4 MB in size. You’re probably only interested in the Appearance CDEV and INIT. Download the “manual install” file I developed for just the Appearance Manager software components here. When you’ve decompressed the file, you’ll find several folders, each named something inside your System Folder. Put the items into the place in your System Folder indicated by the name of the folder they live in.

    Don’t forget to remove the “Color” and “WindowShade” control panels from your Control Panels folder. They are not necessary/not compatible with the Appearance Manager. Place them in your “Control Panels (Disabled)” folder for safekeeping in case you decide to remove the Appearance Manager.

    Restart.

    Optional Java Support

    Install the Macintosh Runtime for Java 2.0. This software isn’t supposed to run on 7.5.5, but it does so fine. It is the first version with a JIT compiler for 68k machines. Only install this if you have a fast 68040 and think you’ll run Java programs (or want to impress your friends with your nerdiness). To install it, download the “manual install” file I developed here. When you’ve decompressed the file, you’ll find several folders, each named something inside your System Folder. Put the items into the place in your System Folder indicated by the name of the folder they live in.

    Restart.

    Completion!

    Party! You’ve now installed a very complete and functional System 7.5.5. It should boot in about 6MB of RAM (assuming a 128k disk cache) and support the running of nearly any 68k compatible program. Connectivity is greatly enhanced due to the TCP/IP functionality, and the stability is good.
    Don’t forget to read the follow-up, System 7.5.5 Favorite Add Ons to get the scoop on all the other software Apple should have provided out-of-the-box.

    This configuration is exactly what I run for my day-to-day work on a Macintosh SE/30 modified with an Asante IIsi/SE-30 ethernet card, 40Mhz DayStar Turbo040, IIsi adaptor card, and 80MB of RAM. It rocks.

    Got any good ideas for how to improve this page? Email me. Spam at fenestrated seperated by dot from net.

    Summary

    Here’s the download links referenced, in a table for your enjoyment.

    System 7.5.3 CompleteParts: 1 | 2 | 3 | 4 | 5 | 6 | 7 | 8 | 9 | 10 | 11 | 12 | 13 | 14 | 15 | 16 | 17 | 18
    System 7.5.5 UpdateParts: 1 | 2 | 3 | 4 | 5
    OpenTransport 1.1.2OT 1.1.2-Net Install.sea
    LaserWriter 8.5.1Images: 1 | 2 | 3 | 4 | 5 | 6
    AppleShare 3.7.4AppleShare_Client_3.7.4.img.bin
    Quicktime 4.0.3
    Appearance Manager 1.0.3Appearance1.0.3.cpt
    Macintosh Runtime for Java 2.0MRJ2.0.cpt
    All the downloadable software mentioned in this article is hosted here
  • SWAG at markreds.it

    Pascal is an imperative e procedural high level programming language. I learnt it at high school and developed applications with Borland Delphi for many years in my first employment.

    The Macintosh System OS (the classic one) was developed in Pascal and Apple released its official documentation keeping this language as main reference to developers that wanted to develop for its platform.

    Fews days ago I’ve found an interesting site about Pascal programming with lots of examples called SWAG (Sourceware Archive Group).

    SWAG is a collection of source code and program examples for the PASCAL programming language. The material has been donated by various PASCAL programmers from around the world, who desire to contribute to the advancement of one of the greatest programming languages there is. SWAG packets are available in 57 different categories covering EVERY aspect of the PASCAL language, and ALL ABSOLUTELY FREE !!! … The material contained in SWAG is intended to be a teaching and learning aid for users of the PASCAL language. Whether you are a beginner or experienced programmer, you’ll find SWAG to be an invaluable source of ideas and information.

    So I’ve decided to keep a copy of the last SWAG release. Click here to start reading.
  • Olivetti M24-240 FAQ

    Olivetti M24-240 FAQ

    Precisazioni e avvertimenti

    Questo articolo è tratto dall’originale M24 e M240: Aggiornamento ed ottimizzazione v. 0.5.1 di ESPer. Purtroppo non riesco più a trovarlo in rete e pertanto ho deciso di pubblicarlo qui, con l’intenzione di aggiornarlo con delle mie note personali.

    Quanto qui scritto si applica anche all’M21 (versione trasportabile dell’M24), all’M24SP (M24 con clock a 10MHz, 640KB di ram e coprocessore matematico 8087 di serie) e in molti casi a qualunque XT compatibile.

    Se non siete abituati ad usare saldatore e cacciavite forse fareste meglio a far fare l’aggiornamento a qualcun’altro più esperto di voi.

    Quanto scritto qui non l’ho potuto testare tutto personalmente, quindi non mi prendo responsabilità per danni a voi ed alle vostre macchine.

    Tutti i marchi citati sono appartenenti ai legittimi proprietari.

    (altro…)
  • Tapuino C64

    Tapuino C64

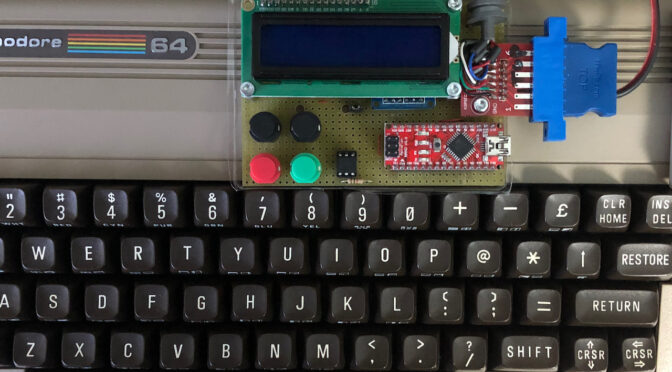
    Il Tapuino è un emulatore hardware del Datassette per il Commodore. Basato su un microcontrollore Arduino Nano, permette di caricare giochi e programmi memorizzati su file da una scheda SD.

    Per chi, come è, ha passato giornate intere davanti allo schermo con il Commodore 64 quando era bambino, sa bene il tempo che ci voleva per caricare un gioco dal nastro di una cassetta audio. All’epoca era il media più diffuso per la sua economicità. Solo i più fortunati potevano permettersi il disk drive 1541.

    Il sistema era anche poco affidabile e capitava spesso, dopo un certo uso, che la testina perdesse l’allineamento facendo fallire il caricamento proprio alla fine e dopo una lunga attesa!

    Il Tapuino non velocizza il processo di caricamento, in quanto emula perfettamente il dispositivo originale, ma almeno lo rende più affidabile.

    Il mio Tapuino realizzato con componenti riciclati che avevo in disuso.

    Così mi sono cimentato nella costruzione del mio Tapuino, dal momento che avevo già tutti i componenti necessari incluso il cavo ricavato dal mio Datassette non più funzionante.

    In realtà il design è davvero semplice e richiede pochi componenti, facilmente reperibili in rete:

    • microcontroller Arduino Nano
    • display LCD con interfaccia I2C
    • 4 tasti push
    • 1 resistenza
    • 1 accoppiatole fotoelettrico

    Sul sito ufficiale si trovano schemi e dettagli dei componenti necessari, pertanto non sto a riscriverli qui.

    Il montaggio è abbastanza semplice se si ha un minimo di dimestichezza con il saldatore. Anche la compilazione e il caricamento del firmware richiede solo l’IDE di Arduino e la creazione del file config-user.h con le impostazioni personali che nel mio caso si tratta di queste pochissime righe:

    #define LCD_USE_1602_LCD_MODULE
    #define LCD_I2C_ADDR        0x3F
    #define TAPUINO_LANGUAGE_IT
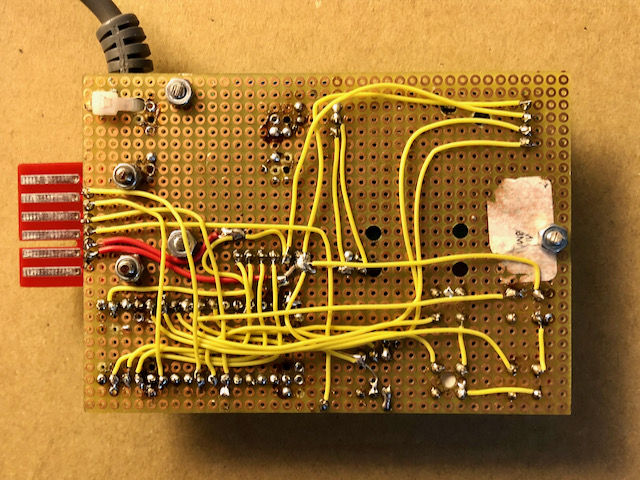
    La scheda filata del mio Tapuino

    Nella mia versione ho aggiunto il PCB del connettore edge, acquistato tempo fa su ebay. In questa maniera potrei collegarci un Datassette vero e trasferire i nastri sulla scheda SD. Per il momento lo uso per prendere l’alimentazione per il mio SD2IEC (ma questa è un’altra storia).

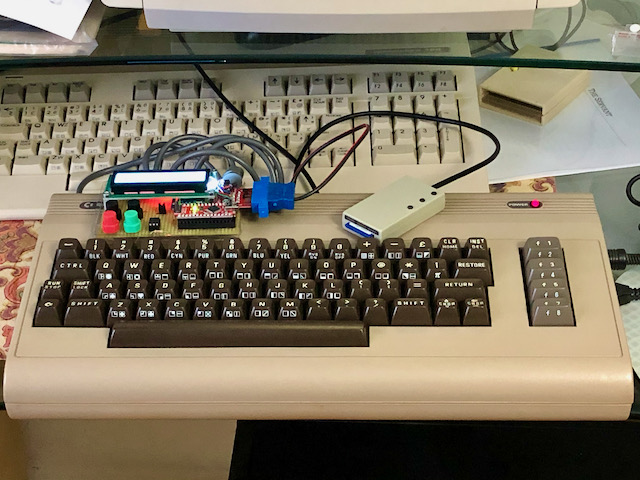
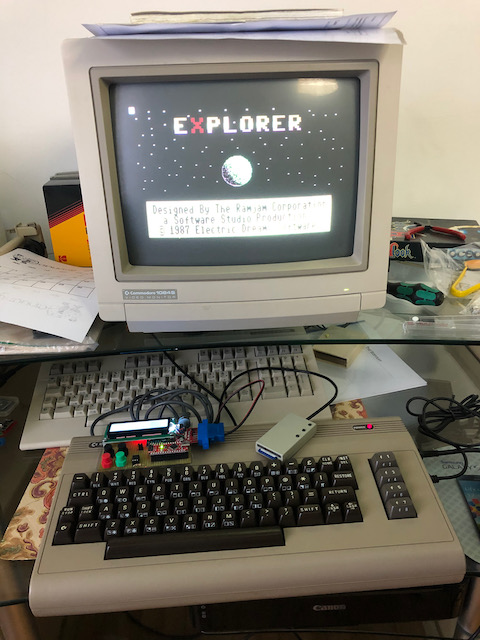
    Tapuino e SD2IEC insieme al mio Breadbin (in fondo c’è il Commodore 128, un altro pezzo della mia collezione).

    A questa punto non rimane che prendere una MicroSD, metterci dei file in formato TAP e… iniziare a caricare i proprio giochi preferiti!

  • C64 breadbin restored

    C64 breadbin restored

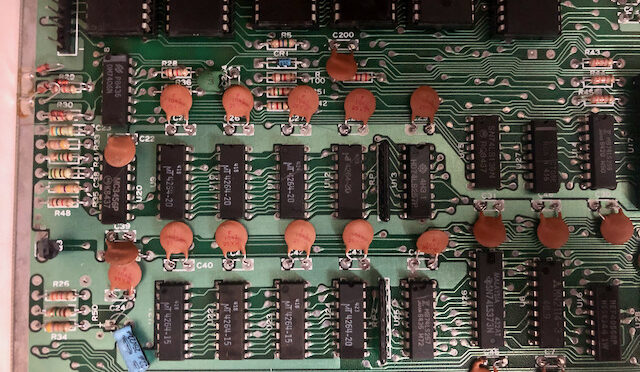
    Some days ago I got this amazing C64 breadbin, aesthetically in very good condition but with a faulty motherboard. Instead of the usual startup screen it showed an horrible “Out of memory error in 0” message error. This is a symptom of one or more bad RAM chips that need to be replaced.

    Bad RAM chips 🙁

    These chips can be replaced with others as long as they have a RAS access time less then or equals to 200 ms. There are some similar models with these codes: 4164-2, MT4264-15, MT4264-20, HM4864P-2, M3764-15RS. I’ve found this good article where I found all the informations I was needed.

    So I’ve bought a new set of RAM chips from a ebay seller and I armed myself with soldering iron and much of patience and started to desoldering and removing all the old chips.

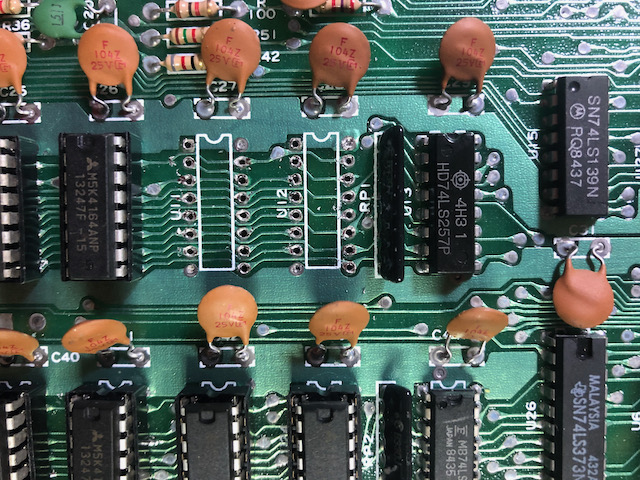
    I had to replace RAM chips with new ones

    Instead of soldering the new chips directly to the board, I soldered eight sockets. So in case of need it will be simple to replace the RAM chips in the future.

    Then I put the new chips in the sockets, crossed my fingers and give power… and finally I saw the Basic screen. It works!!